Holes and dowels (and treenails?)
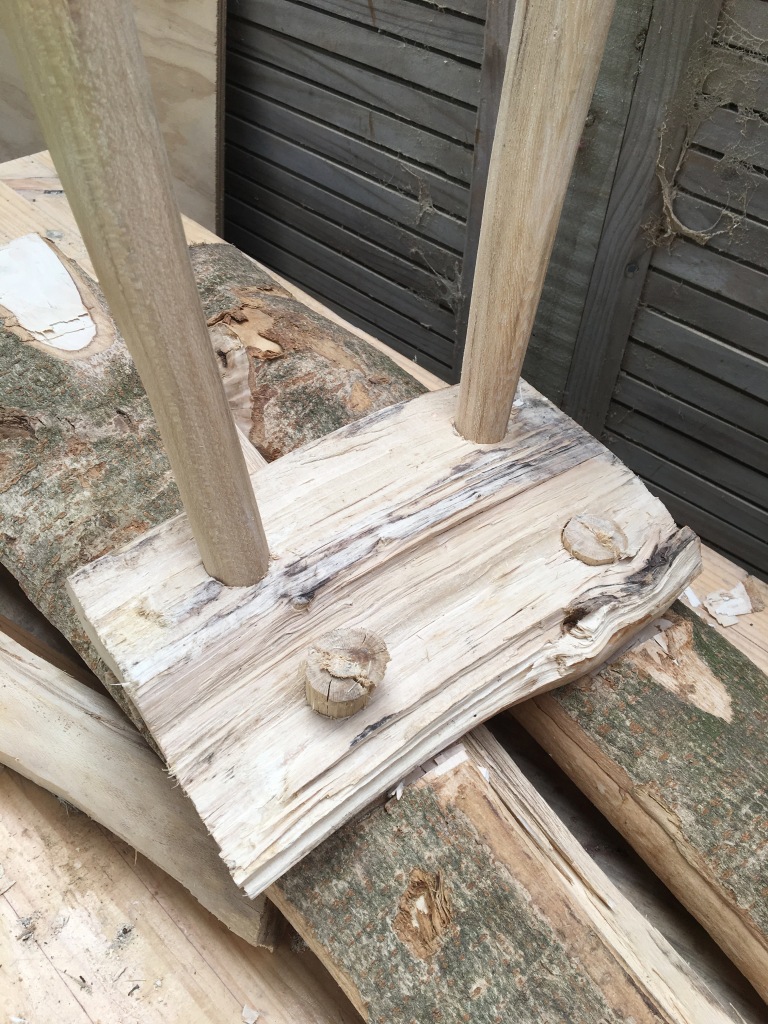
In the previous post I had got to the point where I had pegged together the bench of the seat. This involved two long benchtop pieces, with two cross pieces to hold them together. These were all very roughly shaped, and pretty much just the split pieces of wood. A close look reveals a very rough piece of work.

However, after some very laborious hand drilling using a brace and the largest bit I posess, (25mm) and then shaping some pegs or dowels, that hold the platform/seat in place, the platform is all together. I have to say, that the pegging of the pieces together went well, and I am quite pleased with how this process produces what feels like a robust joint. I am not sure if these count as treenails or not; I think of them more as dowels, although they are unglued. (see below)
The dowels were all shaped reasonably quickly with an axe. I did end up using the axe like a chisel or a knife, taking shavings off the dowels, but this worked fine as they were quite short. I didn’t concern myself with the dowls being completely round; I figured that some hints of corners would compress as the dowels were hammered into the holes, which they duly did. My main concern was splitting the material that they were being forced into, but they are all holding together so far. I also additionally add wedges too a couple of the dowels, but this was done after the fact. I created a small split in the dowel with a chisel at right angles to the grain, and a wedge was then hammered in. By doing it that way it should create tension running with the grain, making it less likely to split. One could, and probably should, pre-cut slots for wedges in the dowels, similar to axe handles, but doing this after the fact seemed to work fine.
All this said; I am seriously thinking of taking the whole thing apart, shaping the bench pieces a little to remove the splinters etc, and then reassembling. The smoother shaped legs really don’t fit with the rough-reeved bench, and I can’t help thinking that it would be aesthetically more pleasing with some shaping of the bench. But taking it all apart might be more problematic than it might first appear.
More on the shaping of the legs, and my new favourite tool, the draw-knife, below.
Treenails
I am, however, quite pleased with the treenails-dowels as the means of holding the whole thing together, and I am a bit reluctant to play around with them too much. I’ve always liked doweling things, and making my own robust treenails and using them for this project is quite satisfying. They also have some good engineering properities apparently. As they swell, the fibres of the timber can mix and bind to the surrounding wood. Historically it was found that wood rotted around metal fasteners in ways that it didn’t around treenails. They should also flex and move with the rest of the wood much more, which is important.
Often when we make things rigid, this just puts a lot of stress on a single joint within a matrix of joints. A bit of flex at each point allows the construction to distribute the load over a broader number of joints and fixings. Wooden chairs can be a classic case of this. People often feel that a chair with flex or movement is a bit dodgy, and potentially unsafe. Often they are, but a rigid, stiff chair, might be misleading about its strength. The stiffness might come from a single joint that could give way catastropically, causing a cascade of failures as other stiff joints suddenly take up the load. Joints that flex allow the load to be distributed a bit more. Modern precision machine made furniture doesn’t really have this problem. Its often very rigid and the individual parts distribute the loads through multiple stiff joints extremely well. The individual joints are often VERY strong utilising modern adhesives, and failures I’ve seen in modern wooden furniture is often the wood rather than the joint. But from what I gather, older chair designs can rely on some flex to distribute load. So using modern rigid glues in such cases might make them less able to cope with that load than they should.
There is more here to learn though. Joints and when they should flex, how much flex is good, and when they should be rigid, are still things to come to grips with for me as a novice.
And just a short note on the treenail-dowel distinction. From what i cand find, dowels can be made of any material. So we can have metal or plastic dowels. This seems obvious in retropect. Treenails are probably just a name for wooden dowels used in wooden construction.
The tale of a drawknife.
In New Zealand we have a online second hand (and new) trading site called TradeMe. Trademe in NZ has become a byword for online buying and selling of second hand goods by individuals. I have been keeping an eye out for various second hand tools, and doing the odd browse, mainly for hand tools that might be useful for green woodworking. Recently a collection of planes came up for sale, and I put in what I thought was a low bid of $52. Really the bid was just because it was local, and because it looked like a good range of planes: 6 of them in all. A couple longer than my current plane, and a couple shorter.
Much to my surprise, I won the auction.
I went to the sellers house to collect it. The seller was a retired professional handyman, downsizing prior to moving to a smaller place out of town; so very much a classic case of cleaning stuff out. I get the impression sometimes that selling stuff for some retired folks isn’t really about making money on old stuff, so much as getting someone to come and take stuff away. Its just less hassle to sell it quickly and cheaply than make a big deal about it.
The planes were all in a plastic box, and as I looked the planes over prior to handing over the money, I found a draw knife. The seller said that this was a “bonus” item. I later discoverd a whetstone and a tool for setting the angle of the grind for a chisel and plane, in the bottom too, so I clearly wasn’t looking that closely through the box! (I really must do better in the future.) Now I’d been that close to ordering a new draw knife, and been in active bidding for second hand drawknives that went for more than $52 dollars, so to find one as a gratis add on with all the planes, themselves very cheap, was something of a bonus.
I gave the seller all the cash I had, something over $52 dollars, as I felt he was selling cheap, and carted this very heavy box of cast iron planes away. The planes themselves are a mixed bag, and two of them match my current one in size, so I will probably sell them on. But I do now feel I can confidently make a box/shelf or something similar to house my collection of planes, reasonably confident I won’t be needing anymore space. I’ve still to check the blades however, so this view of things might change once they have all been cleaned up. But then there was the drawknife. The drawknife felt like it has a fairly keen edge, and I had the reeved pieces of wood ready to go for the next stage, so the planes were put away, and the drawknife, that lucky bonus, had an outing.
Using the drawknife
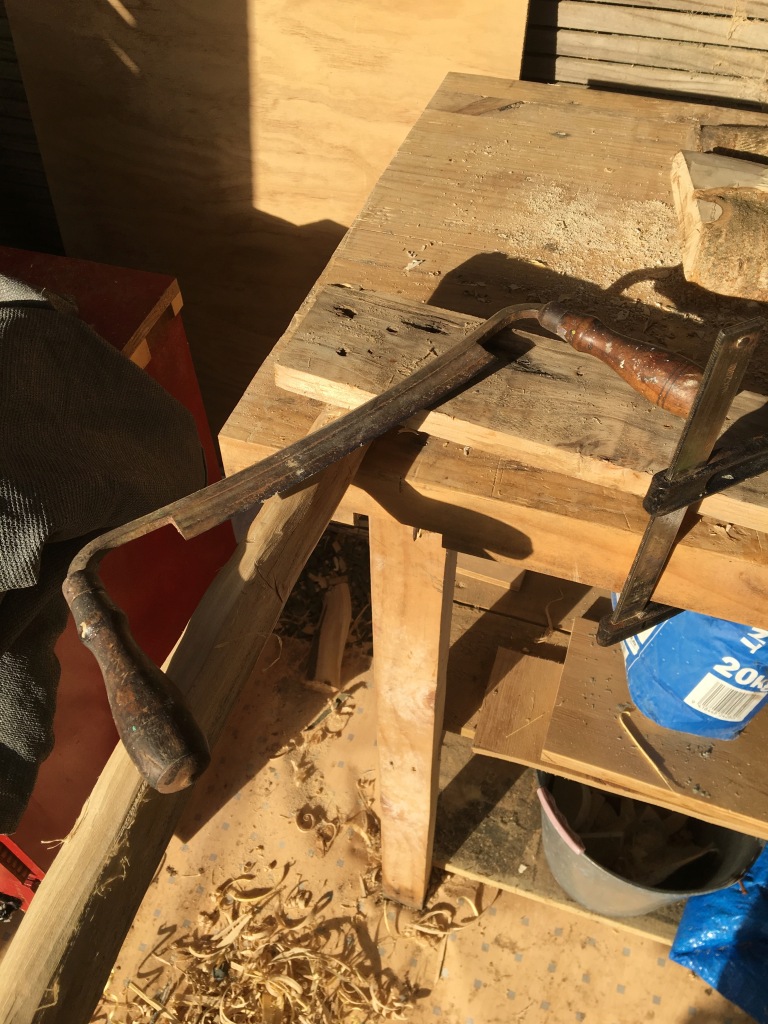
First things first. I’d seen a nice video by Ben Orford on using an axe to preshape a round chair leg that was a useful insight into preparing timber. Although my current axes aren’t quite ideal for this, it was still worthwhile doing some pre-shaping, and the quality of the legs consistency did improve from the upfront investment in using the axe. A drawknife is normally used with a shaving horse, which is a bench with a built seat and a clamp for the timber operated by the feet. I don’t currently have a shavehorse, so I used the simple expedient of clamping to the bench; or more accurately, creating a vice using a clamp on a length of timber. This worked well, as the flex in the timber allowed me to rotate the working piece of wood as I shaped it. But not as well as a shaving horse, obviously.
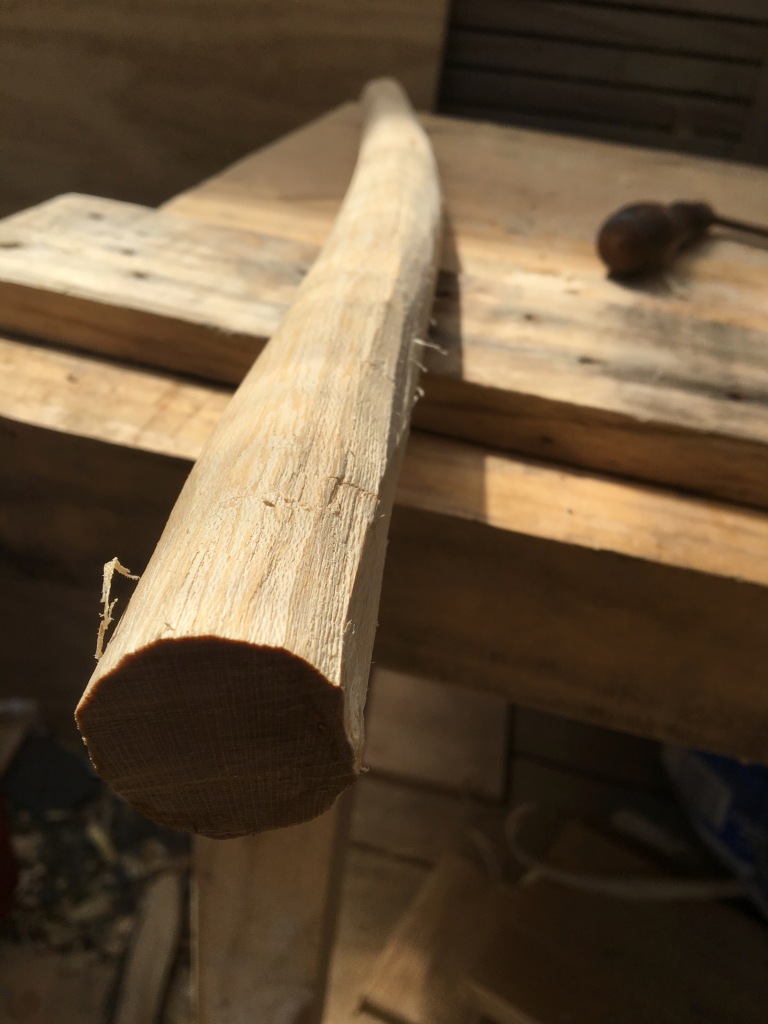
The drawknife itself was something of a dream to use. It felt very straightforward and under control right from the word go. I could do some substantial removal of rougher timber quickly and easily, and it was sharp enough and with enough ‘feel’ and control to remove very fine shaving to make a well curved surface.
There has to be a word or phrase to describe the “feel” a tool provides: That finessing of finer work, that ability to do chunkier work without over stressing the tool. Take Ben Orford’s video on using an axe; he talks about swinging the axe with the same amount weight each time to get a series of cuts with a consistent depth. He is reliant on muscle memory, and the consistency of the timber taking a similar bite from the axe along the length, plus visual information on how deep the cuts are, and tactile information from the blow. But a shaping tool like the drawknife takes this plus some additional feedback from the blade during the length of the stroke or contact with the material. Like painting or drawing a long line, there is feedback from the pressure of the tool on the surface, and tactile and visual information that comes from that interaction. This all feeds forward into the continued action allowing subtle changes in pressure, angle of attack, and effort to either maintain consistency or modify strokes with a flourish or diminishing movement. Single blows don’t really allow for the feedback as part of a continous movement, but instead feed forward into the repeated blow. Blows during iron work can have some of this feedback, but my memory of this doing from doing knifemaking was that this was harder to learn and get a handle on. This was in part the short sharp, and very labour intensive bursts of activity, that metal working on malleable hot metal involved. There wasn’t really enough time involved in the hitting. Plus its often a bit of a big muscle movement, involving substantive amount of core, rather than the finer dextrous movements of the type we might think of as hand and eye. Its also worth noting that in the metal workign another person might be holding the piece on the anvil; so that line of feedback, from the target material, is absent. In the axing case, its present, and the non-tool weilding hand is holding the material, providing feedback. In my case, the jarring from a very blunt tool! In the shave horse case, feedback from the target material might also be present, but we will have to wait and see about that.
[youtube https://www.youtube.com/watch?v=nVuOJ7RkuXA&w=560&h=315]
The upshot is that I enjoyed using the drawknife. The ‘feel’ of it was good, and the action and results all felt natural to the hand. I was able to round a piece of reeved and axed timber comfortably, with larger chunkier pieces removed, and fine shavings also being easy to do. The feedback is at once tactile through the two handles, but also visual, as the tool’s actions are comfortably within the field of view. In short, I think as a tool the drawknife is going to get a fair amount of use, and I am probably going to have to make a shaving horse.
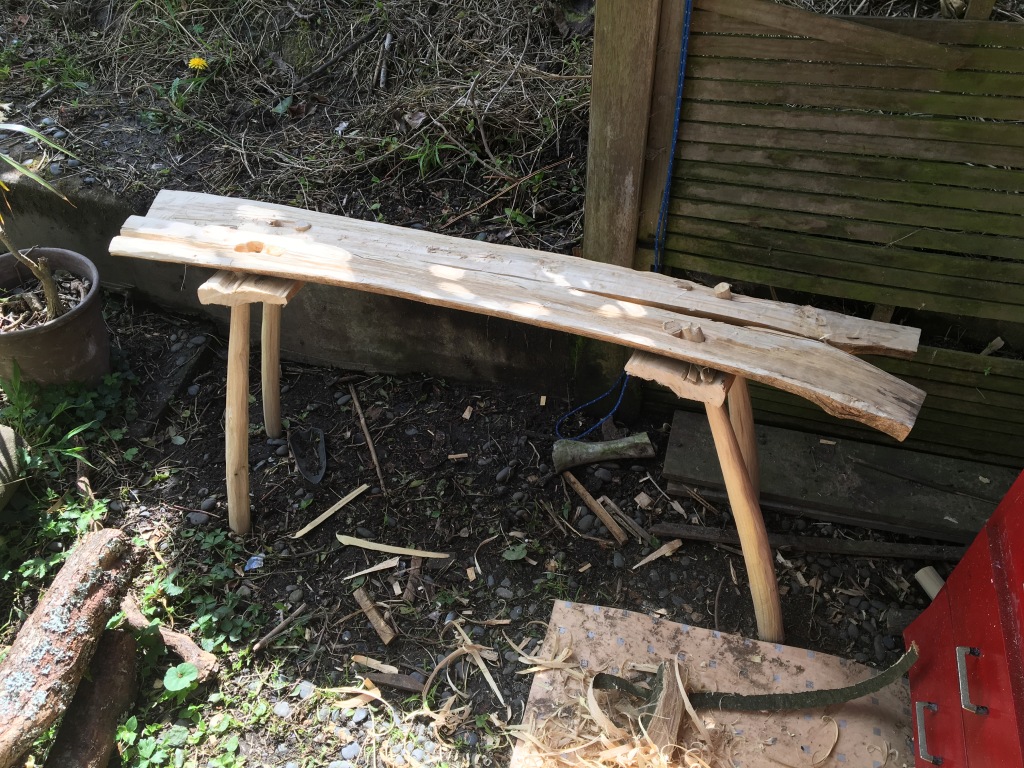
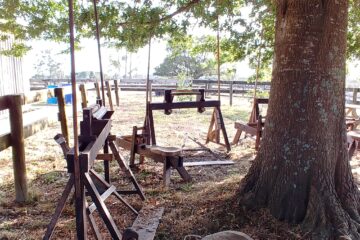
The final bench is done then. Its very rough over the top, and barely shaped. It lacks anything resembling finesse, except in the legs which show a progression of aquired skill in the level of finish and consistency. The earliest leg is the fattest at the bottom. But it’s perfectly adequate, and will act, at least in the short term, and a place to sit while doing spoonmaking or other whittling work. As a piece of green woodworking, its been a piece to learn on, and try things out. I will still no doubt benefit from further instruction and guided learning. The short video highlighted above provided an approach to a task that was useful, and one of the themes of these essays and blogs going forward will be the relationship between guided hands-on learning and being “self taught.” What self taught means in an age of video guides is a bit up for grabs, but that can wait for another day.


0 Comments